

Methods
Methods
The original fragile and heavy glass containers presented challenges for transportation, and glass jars were largely replaced in commercial canneries with cylindrical tin or wrought-iron canisters (later shortened to "cans") following the work of Peter Durand (1810). Cans are cheaper and quicker to make, and much less fragile than glass jars. Glass jars have remained popular for some high-value products and in home canning. Can openers were not invented for another thirty years — at first, soldiers had to cut the cans open with bayonets or smash them open with rocks. Today, tin-coated steel is the material most commonly used. Laminate vacuum pouches are also used for canning, such as used in MREs and Capri Sun drinks.
To prevent the food from being spoiled before and during containment, a number of methods are used: pasteurisation, boiling (and other applications of high temperature over a period of time), refrigeration, freezing, drying, vacuum treatment, antimicrobial agents that are natural to the recipe of the foods being preserved, a sufficient dose of ionizing radiation, submersion in a strong saline solution, acid, base, osmotically extreme (for example very sugary) or other microbially-challenging environments.
Other than sterilization, no method is perfectly dependable as a preservative. For example, the microorganism Clostridium botulinum (which causes botulism) can only be eliminated at temperatures above the boiling point of water.
From a public safety point of view, foods with low acidity (a pH more than 4.6) need sterilization under high temperature (116-130 °C). To achieve temperatures above the boiling point requires the use of a pressure canner. Foods that must be pressure canned include most vegetables, meat, seafood, poultry, and dairy products. The only foods that may be safely canned in an ordinary boiling water bath are highly acidic ones with a pH below 4.6, such as fruits, pickled vegetables, or other foods to which acidic additives have been added.
Double seams
Invented in 1888 by Max Ams, modern double seams provide an airtight seal to the tin can. This airtight nature is crucial to keeping micro-organisms out of the can and keeping its contents sealed inside. Thus, double seamed cans are also known as Sanitary Cans. Developed in 1900 in Europe, this sort of can was made of the traditional cylindrical body made with tin plate. The two ends (lids) were attached using what is now called a double seam. A can thus sealed is impervious to contamination by creating two tight continuous folds between the can's cylindrical body and the lids. This eliminated the need for solder and allowed improvements in manufacturing speed, reducing cost.
Double seaming uses rollers to shape the can, lid and the final double seam. To make a sanitary can and lid suitable for double seaming, manufacture begins with a sheet of coated tin plate. To create the can body, rectangles are cut and curled around a die, and welded together creating a cylinder with a side seam.
Rollers are then used to flare out one or both ends of the cylinder to create a quarter circle flange around the circumference. Precision is required to ensure that the welded sides are perfectly aligned, as any misalignment will cause inconsistent flange shape, compromising its integrity.
A circle is then cut from the sheet using a die cutter. The circle is shaped in a stamping press to create a downward countersink to fit snugly into the can body. The result can be compared to an upside down and very flat top hat. The outer edge is then curled down and around about 140 degrees using rollers to create the end curl.
The result is a steel tube with a flanged edge, and a countersunk steel disc with a curled edge. A rubber compound is put inside the curl.
Seaming
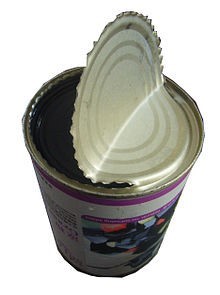
Opened can
The body and end are brought together in a seamer and held in place by the base plate and chuck, respectively. The base plate provides a sure footing for the can body during the seaming operation and the chuck fits snugly into the end (lid). The result is the countersink of the end sits inside the top of the can body just below the flange. The end curl protrudes slightly beyond the flange.
First operation
Once brought together in the seamer, the seaming head presses a first operation roller against the end curl. The end curl is pressed against the flange curling it in toward the body and under the flange. The flange is also bent downward, and the end and body are now loosely joined together. The first operation roller is then retracted. At this point five thicknesses of steel exist in the seam. From the outside in they are:
1. End
2. Flange
3. End Curl
4. Body
5. Countersink
Second operation
The seaming head then engages the second operation roller against the partly formed seam. The second operation presses all five steel components together tightly to form the final seal. The five layers in the final seam are then called; a) End, b) Body Hook, c) Cover Hook, d) Body, e) Countersink. All sanitary cans require a filling medium within the seam because otherwise the metal-to-metal contact will not maintain a hermetic seal. In most cases, a rubberized compound is placed inside the end curl radius, forming the critical seal between the end and the body.
Probably the most important innovation since the introduction of double seams is the welded side seam. Prior to the welded side seam, the can body was folded and/or soldered together, leaving a relatively thick side seam. The thick side seam required that the side seam end juncture at the end curl to have more metal to curl around before closing in behind the Body Hook or flange, with a greater opportunity for error.
Seamer setup and quality assurance
Many different parts during the seaming process are critical in ensuring that a can is airtight and vacuum sealed. The dangers of a can that is not hermetically sealed are contamination by foreign objects (bacteria or fungicide sprays), or that the can could leak or spoil.
One important part is the seamer setup. This process is usually performed by an experienced technician. Amongst the parts that need setup are seamer rolls and chucks which have to be set in their exact position (using a feeler gauge or a clearance gauge). The lifter pressure and position, roll and chuck designs, tooling wear, and bearing wear all contribute to a good double seam.
Incorrect setups can be non-intuitive. For example, due to the springback effect, a seam can appear loose, when in reality it was closed too tight and has opened up like a spring. For this reason, experienced operators and good seamer setup are critical to ensure that double seams are properly closed.
Quality control usually involves taking full cans from the line - one per seamer head, at least once or twice per shift, and performing a teardown operation (wrinkle / tightness), mechanical tests (external thickness, seamer length/height and countersink) as well as cutting the seam open with a twin blade saw and measuring with a double seam inspection system. The combination of these measurements will determine the seam's quality.
Use of a Statistical Process Control (SPC) software in conjunction with a manual double-seam monitor, computerized double seam scanner, or even a fully automatic double seam inspection system makes the laborious process of double seam inspection faster and much more accurate. Statistically tracking the performance of each head or seaming station of the can seamer allows for better prediction of can seamer issues, and may be used to plan maintenance when convenient, rather than to simply react after bad or unsafe cans have been produced.
- Pre:History and development of can 2016/10/26
- Next:On the Safety of Canned Food 2016/10/26